Let's Keep Your People In The Loop!
You can send out a large "Blast Message" that can be sent to any of your contacts in your account.
This is a great way to keep large groups of people up-to-date on your latest products, services, and information. This is like posting something on social media.
Everybody in your contact groups who has opted-in to your keyword will receive your content.
You choose who you send it to by filtering through different contact groups.
Important: Before we send a Blast Message, make sure you have already created an EPYPE, made a Keyword, and added Contact/s to Groups.
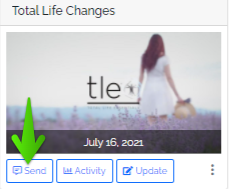
Quick Send Option
The Quick Send option is for people that are already opted-in.
This can be found on your EPYPE in the EPYPE library.
Click on the Send button on the EPYPE you want to send and you will have the option to send it to Subscribers or an Individual.
Subscribers - Choose subscribers (people who have opted-in) by Keyword.
Individual - Type the individual's phone number. Make sure the person you want to send to has already opted-in to receive your content.
Type a message then choose to send it Now or Later.

Let's Start Sending Blast Messages
Go to the Marketing Dropdown and click New Message Blast.
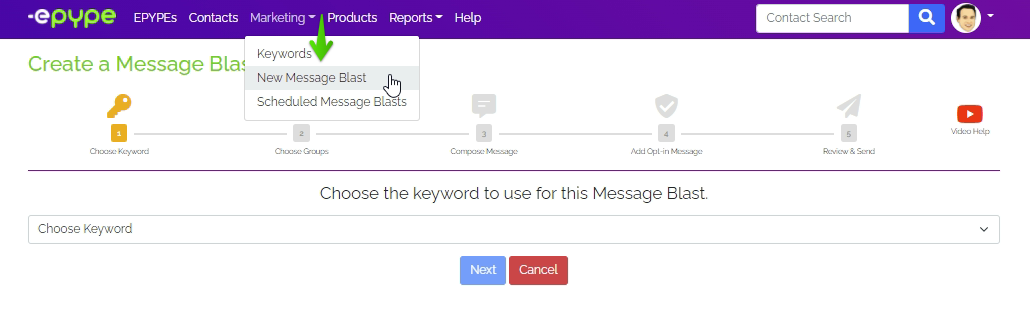
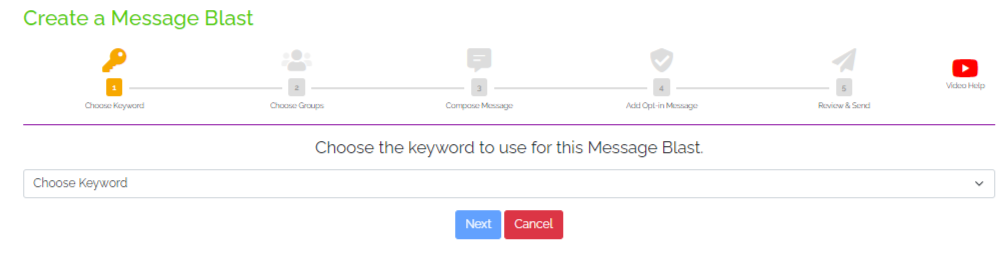
First: Choose a Keyword - Click on Choose Keyword and a dropdown will appear with Keywords you already created. Choose one to use for this Blast Message.
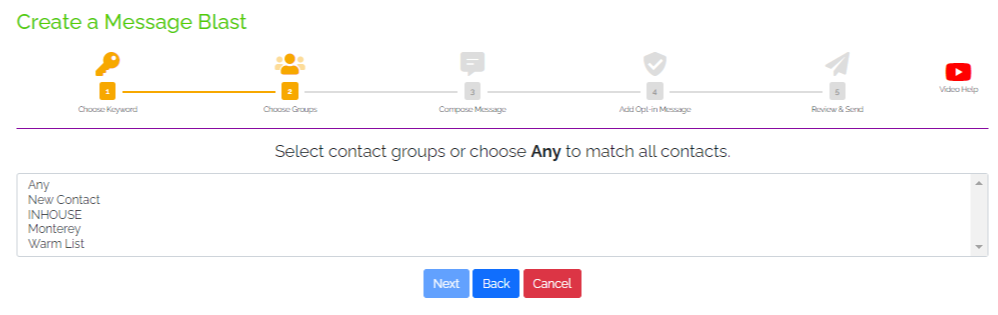
Second: Choose Groups - Choose a Contact Group to send the Blast Message to.
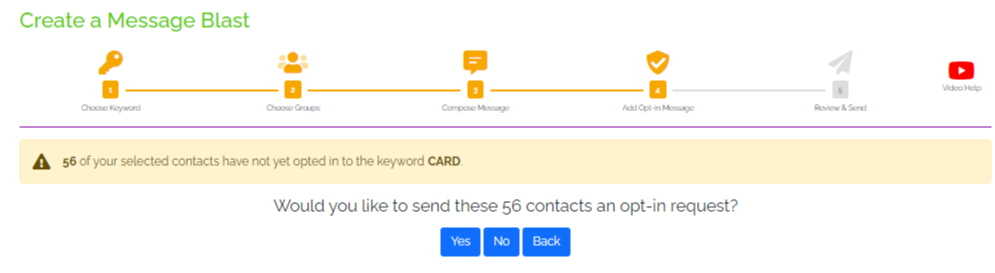
If there are contacts in the Contact Group that haven't opted-in yet, you can send an invite for them to opt in later. The invite message will be drafted in step 4.
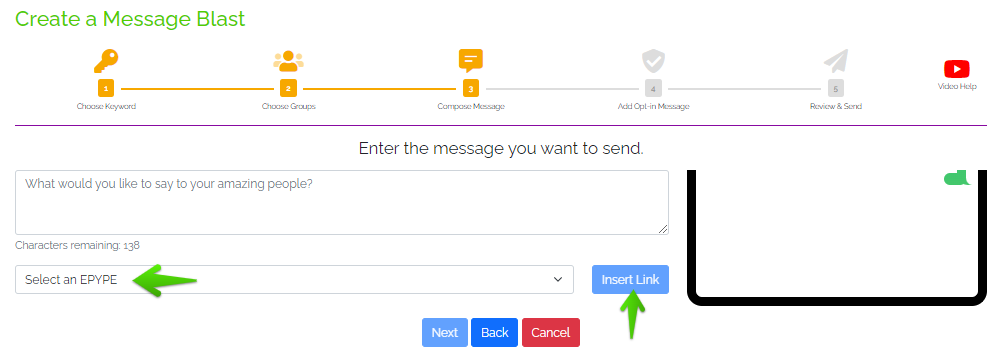
Third: Compose Message - Create a message for people who have opted-in.
A preview of your message will appear on the right corner of the screen in the phone view.
You can also attach an EPYPE link here!
Click the EPYPE drop-down and select the EPYPE you want to send out.
Don't forget to click the Insert Link button to the right of the drop-down.
Fourth: Add Opt-In Message - A message notification will pop up if there are contacts in your Contact Group who haven't opted-in.
This message notification will tell you how many contacts haven't opted-in.
Click on either Yes or No when asked if you would like to send an opt-in request to these Contact/s.
- Yes - this option will prompt you to create an opt-in message to send. It looks the same as the screenshot above minus the Insert EPYPE part.
- No - Proceeds to the next step.
Fifth: Review & Send - Review message blast preview.
A preview from the perspective of one of your contacts can be seen before you send it.
You can see the opt-in message, the person texting the keyword to get the message, the Msg & Data Rates, and the content message that has the clickable link to your EPYPE.
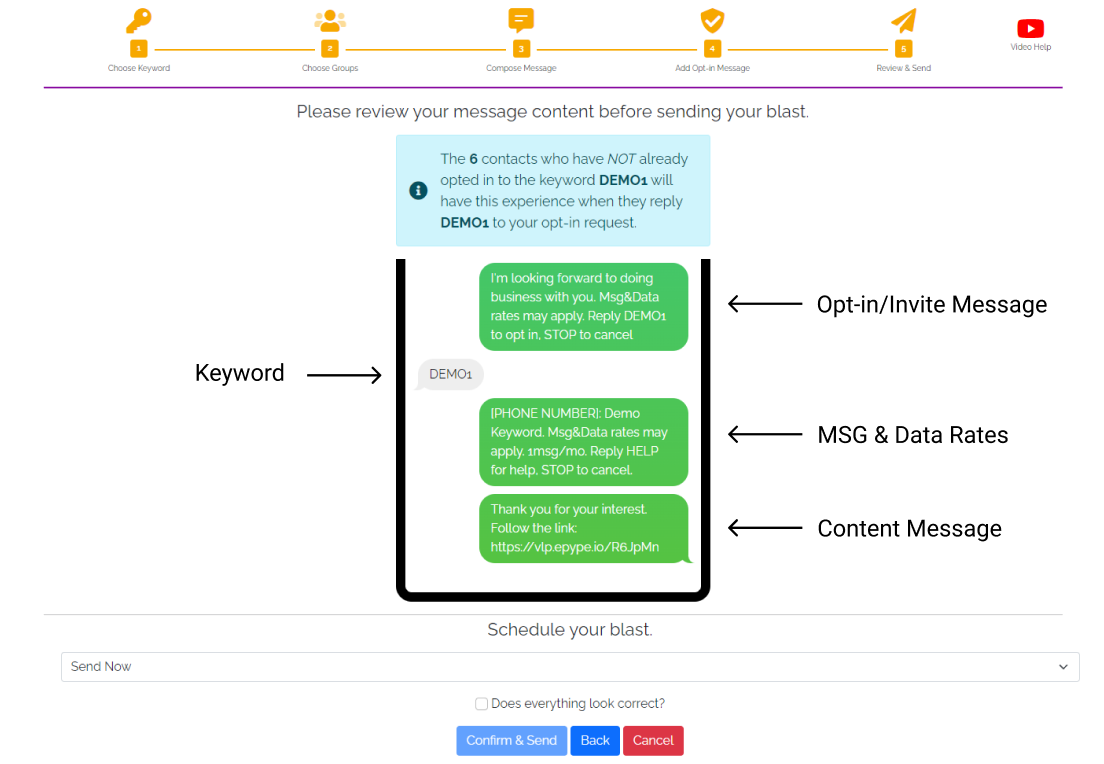
Choose whether to send the message now or schedule for later.
Pick a date and time if you selected Send Later.
Click on the checkbox if everything looks good then on Confirm & Send button.

Congratulations! You have successfully sent a Blast Message!
Manage Scheduled Blasts
Go to the Marketing Dropdown and click Scheduled Message Blasts
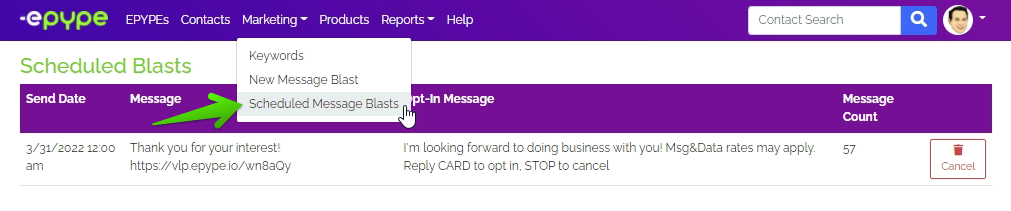
From here, you can see when your blast message will be sent, the content message, the opt-in message, and the message count. You can delete the message at any time before it is sent out.
