Sending A Blast Message
You can choose which contacts to send a blast message to by selecting a group of contacts and choosing a keyword to associate with this message. If there are contacts who haven't followed you or opted-in, you can send an invite message. You want to keep these messages short and to the point. The main highlight of these blast messages is your Epype! This is sent as a link in the message that you send out.
You can either do a Quick Send for people who have opted-in to your keyword/s by clicking the Send button on your Epype or go through the Sending Blast Message process under Messaging for people who have and haven't opted-in to your keyword/s. Let's take a look at how to do both options.
Important: Before we send a Blast Message, make sure you have already created an Epype, made a Keyword, and added Contact/s to Groups.
Quick Send Option
The Quick Send option is a quick way to send your Epype and is available on the Epype library. Click on the Send button and you will have an option to send it to Subscribers or an Individual.
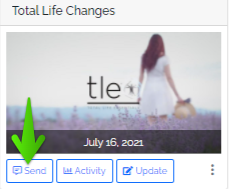
Subscribers - Choose subscribers by Keyword.
Individual - Type the individual's phone number. Make sure you've received consent to send messages to that person.
Type a message. Note that Epype URL will be automatically added to your message.
Choose to send it Now or Later. You can pick a Date and Time for Send Later option.
Be sure to click on Send Message after.

Let's Start Sending Blast Messages
1. Go to Marketing Dropdown > New Message Blast
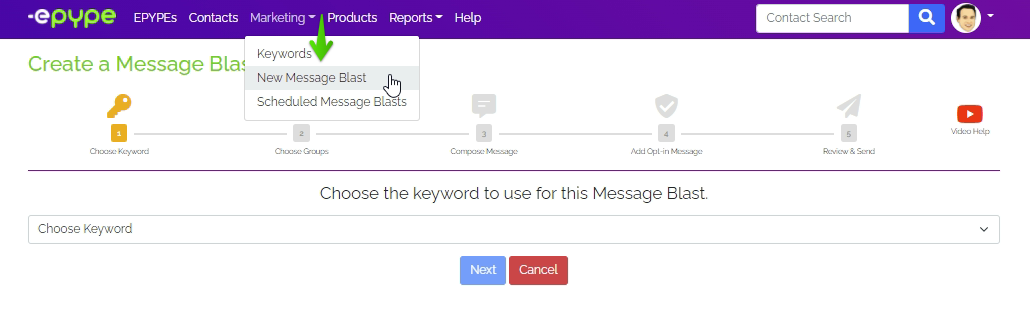
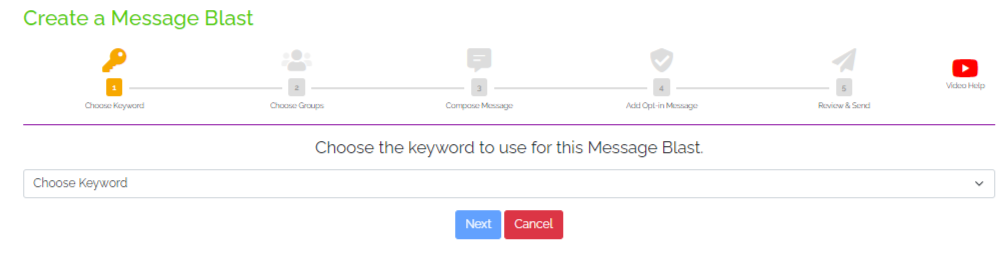
2. Choose Keyword - Click on Choose Keyword and a dropdown will appear with Keyword/s you already created. Choose one to use for this Blast Message.
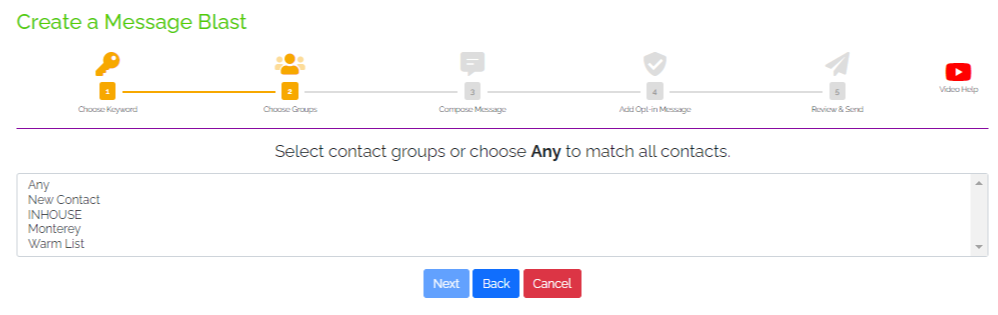
3. Choose Groups - Choose one or more Groups to send the Blast Message to. If there is a Contact/s on the Groups who hasn't opted-in yet, you can send an invite for them to opt-in later.
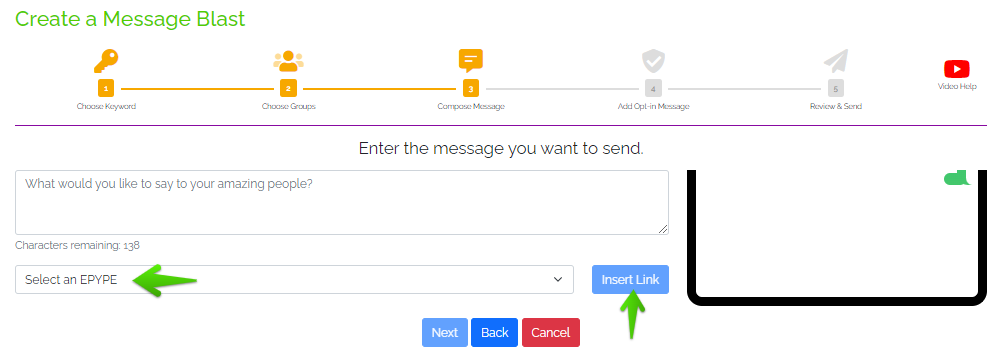
4. Compose Message - Create a message for people who have opted-in. Preview of the message will appear on the box, right side of the screen.
You can also attach an Epype link here! Select from the dropdown after clicking on Select an Epype then click on the Insert Link button.
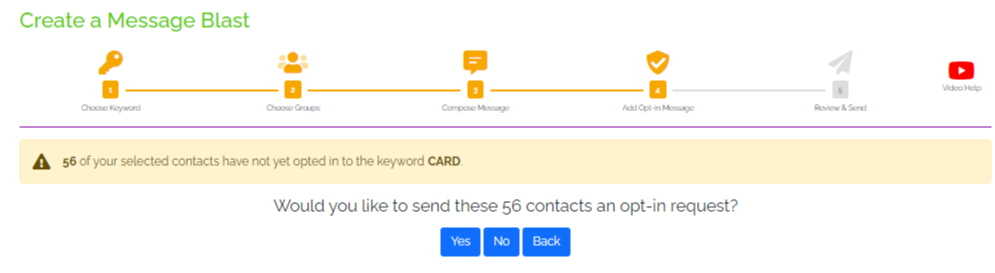
5. Add Opt-In Message - A message will show informing you how many contacts have not yet opted-in. Click on either Yes or No when asked if you would like to send an opt-in request to these Contact/s.
- Yes - this option will prompt you to create an opt-in message to send. It looks the same as the screenshot above minus the Insert Epype part.
- No - Proceeds to the next step.
6. Review & Send - Review message blast preview. If an Opt-In Request Message was created, a preview will show on the RIGHT side. While the LEFT side will show the Message Blast for people who already opted-in.
Choose whether to send the message Now or Schedule for Later.
Pick a Date and Time if you selected Send Later.
Click on the tickbox if everything looks good then on Confirm & Send button.
Congratulations! You have successfully sent a Blast Message!

Manage Scheduled Blasts
Go to Marketing Dropdown > Scheduled Message Blasts
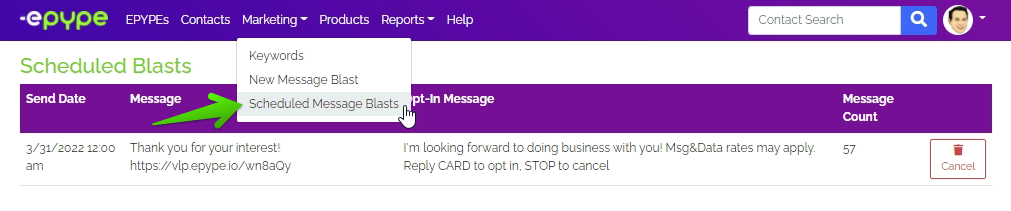
A list of Scheduled Message Blasts would be available here. You can choose to delete a message blast any time before it would be sent out.

Last Updated by: ES 03/15/2022