Adding Contacts is Super Easy!
There are a few easy ways you can add contacts to your account. Typically, contacts are added one by one. Fill out the first name, last name, phone number, etc. Here in EPYPE, you can also add contacts thru Keywords.
Text the keyword to the person's number and it's just like following someone on social media! Check out the Exchange Contacts feature too. By sending the quick form they filled out to you, they will be saved in your account's contacts.
EPYPE is a great CRM.
Did you know that you can add large groups of contacts easily by importing a CSV File? That's right! No need to do them one by one.
Need help creating a CSV File from Google and iCloud? Click on the hyperlink!
Let's Walk You Through Uploading Large Groups of Contacts
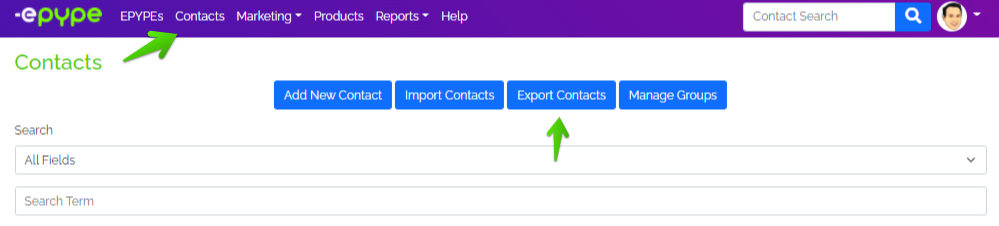
1. Go to Contacts > Import Contacts.

Before following the step-by-step process of Importing Contacts, it is a good idea to arrange the CSV file that contains your contacts since the system will capture the information as it appears on the CSV file. Let's use the screenshot below as a guide.
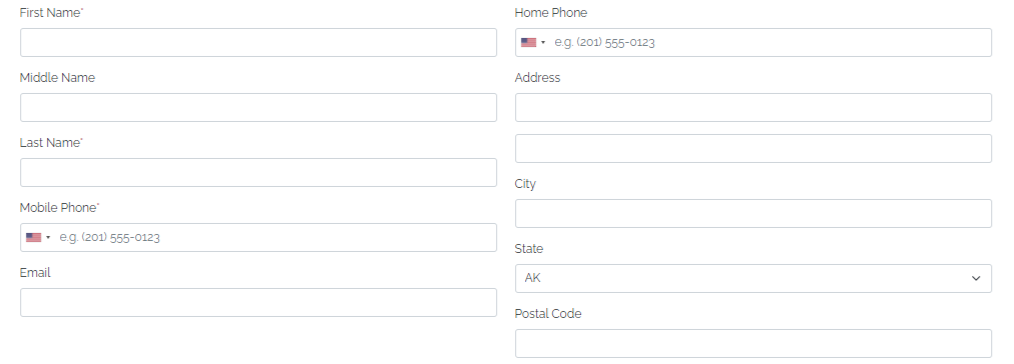
Required Information: (A contact should always have the following information to be uploaded)
- First Name - This will appear on the contact name.
- Last Name - This will appear on the contact name.
- Mobile Phone - Please see the format shown in the screenshot below. Phone numbers should contain 10 digits to be valid.

Optional Information: (A contact would still be uploaded even without the information below)
- Middle Name - You will only see this information when you click on the contact link.
- Email Address - One of the information you can see on the contact preview.
- Home Number - Phone numbers should contain 10 digits to be valid.
- Address, City, State, and Postal Code - You will only see this information when you click on the contact link.
If you weren't able to find time to arrange the contact details, that's fine.
You will have the option to choose which information would be uploaded to your contacts. Just bear in mind, that the system will capture the information as it appears on the CSV file.
Ready the Group you will upload the contacts from your CSV file.
Step-by-Step Process:
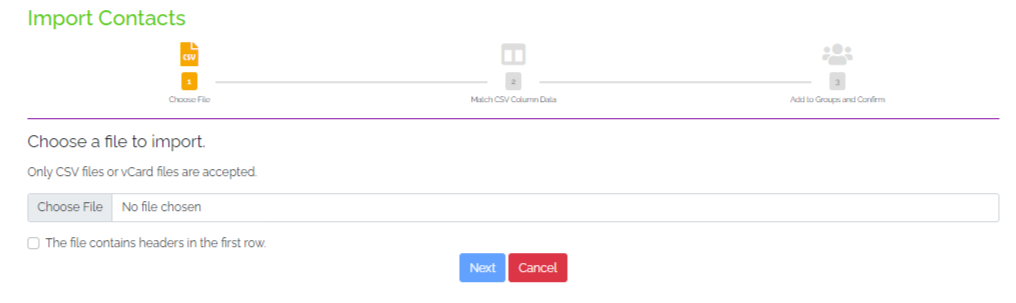
Step 1: Choose File
Select the CSV file from your device. Be sure to check on the tickbox if the CSV file has headers in the first row. Click Next once done.
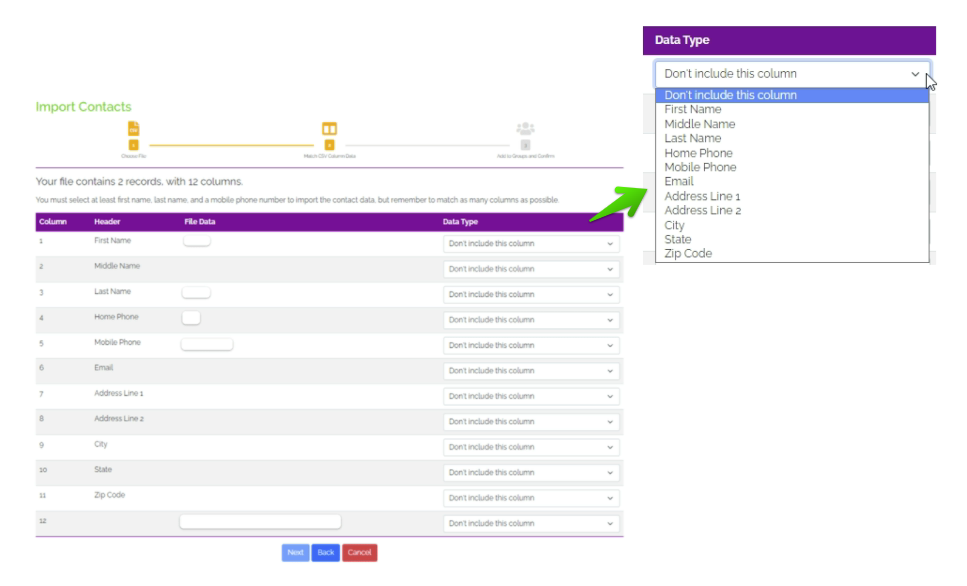
Step 2: Match CSV Column Data
On the left side, you will see the first-row information from your CSV file. Match the type of data it is on the right-side dropdown. You can also choose not to include the information.
Remember:
- We need at least the First Name, Last Name, and Mobile Number.
- Any invalid information will prevent the contact from being uploaded. Refer to Required Information and Optional Information.
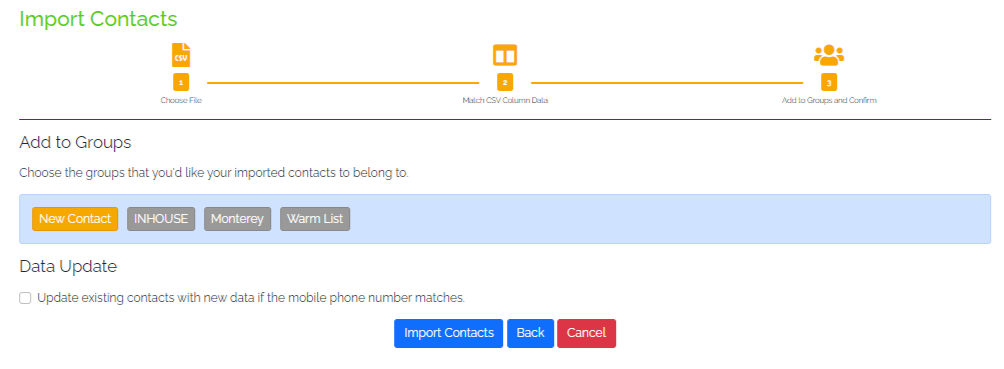
Step 3: Add to Groups and Confirm
Select the Groups you wanted the contacts to be uploaded to. The Group tile will turn yellow once selected. To update the existing contacts with new data if the mobile phone number matches, be sure to check on the tickbox. Click on Import Contacts to confirm the upload!
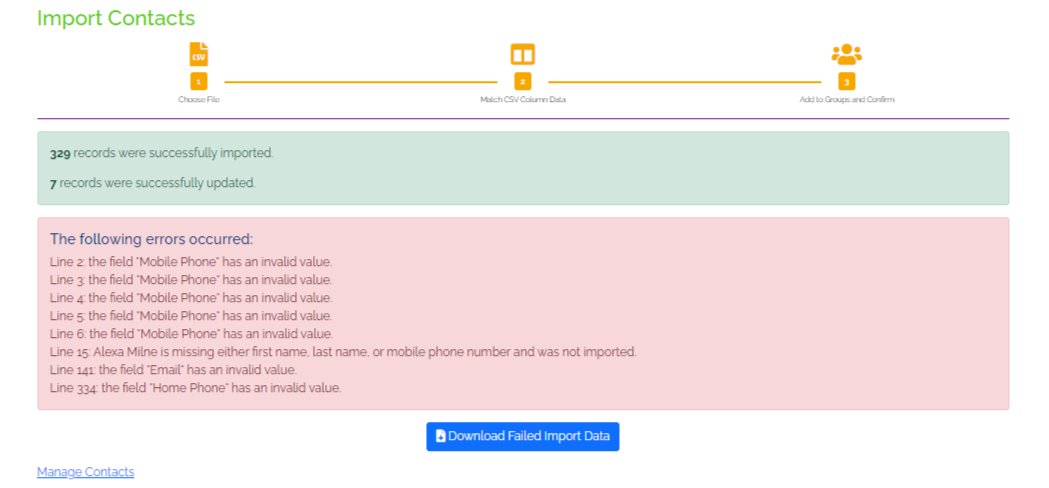
Here's an example of the message you might get after importing the contacts:
Text in Green - You will see this message for successfully uploaded contacts.
Text in Red - You will see this message for the contacts that were not uploaded. The reason and which contact was not uploaded is written there. What's great is you can click on Download Failed Import Data. This makes it easier for you to revisit the contacts that were not uploaded and try to upload them again once the data is fixed.
Manage Contacts routes you to your Contact Directory and manage your contacts.
Now, it is easy to add contacts. Not only there are different ways to add an individual contact, but you can also upload bulk contacts in one go!
Managing contacts is also hassle-free since everything is in one place.
As an added bonus. you can also export your EPYPE contacts as a CSV quickly and easily. Go to Export Contacts. Just one click on CSV and you are ready to save the file containing your contacts!